No products in the basket.
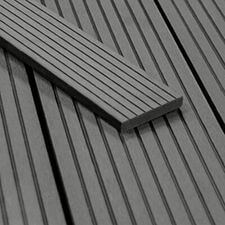
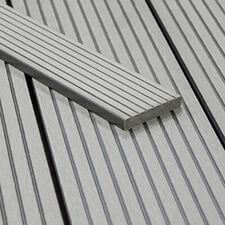
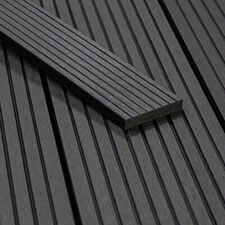
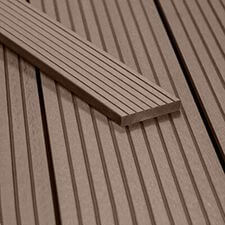


Tough Decking – Frequently Asked Questions
Our Frequently Asked Questions page is designed to help you find answers to the most common questions regarding the purchase, installation, and ongoing maintenance of Composite Decking.
Although we try to answer every question asked of us, there may be times when your particular installation is far more complicated. In this instance, if you can’t find the answers to your questions here, we advise that you give us a call during office hours to discuss your project.
Filter FAQ’s Categories
Planning & General QuestionsInstallation & MaintenanceWarranty & After Sales SupportShow AllInstallation & Maintenance (12)
As a general rule we expect you to have your order within 3-4 working days. We offer one of the fastest delivery schedules for composite decking in the UK.
Remote locations such as the Scottish Highlands, Channel Islands etc. will experience a longer delivery schedule.
Decking Fall refers to the slight slope or angle that is intentionally created in the surface of the deck. This slope is usually achieved by sloping the deck’s substructure, or by using special joists or other supports designed to create a sloped surface.
The reason for creating a decking fall is to ensure that the surface of the deck is not completely flat, but instead has a slight slope that allows water to drain off of it. This is important because if water is allowed to pool on the surface of the deck, it can cause damage to the decking material over time, and can also create a slip hazard when the surface is wet.
By creating a slight slope in the surface of the deck, water is directed towards the edges of the deck where it can be safely drained away. This helps to protect the decking material and ensure that the deck remains safe and functional for years to come.
Supporting the ends of composite decking boards is important for several reasons.
Firstly, composite decking boards can expand and contract with changes in temperature and humidity. This movement can be more pronounced at the ends of the boards. If the ends are not properly supported, they can sag or even break, causing an uneven and unstable surface.
Secondly, composite decking boards are typically heavier than traditional wood boards. This extra weight can put additional stress on the ends of the boards, making them more susceptible to damage if not properly supported.
Finally, supporting the ends of composite decking boards helps to ensure a more uniform and attractive appearance. Without proper support, the ends of the boards may bow or warp, leading to an unsightly and unprofessional finish.
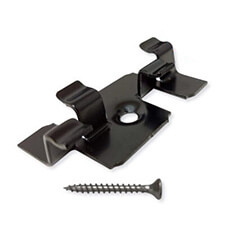
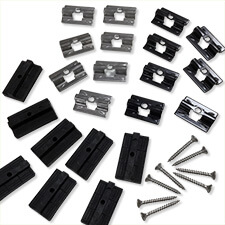
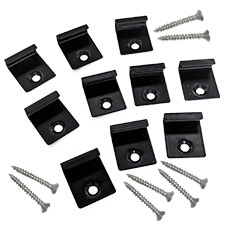
We recommended using 8 fixing clips per board for several reasons.
- Stability: Using 8 fixing clips per board ensures that the board is securely fastened to the joists, which improves the overall stability and durability of the deck.
- Even spacing: Using 8 clips per board also ensures that the board is evenly spaced from the adjacent boards, which creates a consistent and aesthetically pleasing appearance.
- Reduced movement: Composite decking boards tend to expand and contract with temperature changes, and using 8 fixing clips per board helps to reduce the movement and minimize the risk of warping or buckling.
- Better weight distribution: Distributing the weight of the board across 8 clips instead of just a few helps to prevent the board from sagging or bending under heavy loads, which is important for maintaining the integrity of the deck.
Overall, using 8 fixing clips per board is a best practice for installing composite decking, and it helps to ensure a long-lasting, stable, and visually appealing deck.
If you have forgotten to install a double joist in the context of composite decking, there are several options available to you.
- Install a sister joist: If the existing joist is still in good condition, you can install a sister joist next to it. A sister joist is a second joist that is attached to the existing joist, which can help to provide additional support for the decking board.
- Add blocking: If you cannot install a sister joist, you can add blocking between the existing joists. Blocking is a piece of wood that is installed between the joists, which can help to prevent the decking board from sagging or bending.
- Replace the board: If the decking board is already installed, you may need to remove it and install a new board with the correct support. While this may be more time-consuming, it is important to ensure that the deck is structurally sound and safe.
A “Noggin” is a term used to refer to a piece of material, usually made of wood, that is used to provide structural support between joists or to fill in gaps between them. Noggins are often used to prevent the joists from twisting or bending, and to improve the overall stability of the deck. They are typically installed perpendicular to the joists and secured in place with screws or nails.
Cleaning composite decking is a relatively simple process that can be done using basic tools and materials. Here are some steps to follow:
- Clear the surface: Remove any debris, leaves, or twigs from the surface of the decking using a broom or a leaf blower.
- Apply the cleaning solution: Apply the cleaning solution using a soft-bristled brush or a power washer on a low setting, working in small sections at a time. Avoid using a pressure washer on a high setting, as it may damage the surface of the decking.
- Scrub the surface: Use a soft-bristled brush to scrub the surface of the decking in a circular motion, focusing on any areas with stains or dirt buildup.
- Rinse the surface: Rinse the surface thoroughly with clean water using a hose or pressure washer on a low setting to remove all the soap residue and dirt.
- Let it dry: Allow the decking to dry completely before using it again.
We have a page dedicated to Composite Decking Cleaning with an in depth explanation, and video showing you the cleaning steps.
If you have scratched your composite decking, it may not be necessary to replace it. Composite decking is durable and can withstand minor scratches and scuffs. However, the severity of the scratch will determine if you need to replace the affected boards.
If the scratch is minor and doesn’t affect the structural integrity of the board, you can consider repairing the scratch. You can use a heat gun or a hot air blower to heat the scratch, which will cause the composite material to expand and fill in the scratch.
If the scratch is deep and affects the structural integrity of the board, you may need to replace the affected boards. Deep scratches can compromise the strength and stability of the board, which can affect the safety of the deck.
The severity of the scratch will determine if you need to replace your composite decking. If the scratch is minor, you can repair it. If the scratch is deep and affects the structural integrity of the board, you may need to replace the affected boards.
Expansion and contraction should be factored in when installing composite decking because the material can expand and contract with changes in temperature and humidity. Composite decking is made of a combination of wood fibres and plastic, which can react differently to environmental changes.
During hot weather, the composite decking can expand, and during cold weather, it can contract. If the decking is not installed with enough space for this expansion and contraction, it can cause the boards to buckle, warp, or crack. This can lead to an unsightly and unsafe deck surface.
To prevent these issues, it’s essential to leave a gap between each board when installing composite decking. The amount of space needed will depend on the specific product being installed and the climate in the installation area.
By factoring in expansion and contraction during installation, you can ensure that your composite decking looks great and remains structurally sound for years to come.
An expansion gap refers to the space left between the ends of the decking boards to accommodate any potential expansion or contraction of the material due to changes in temperature and humidity.
A staggered joint refers to a method of joining two boards end-to-end in a way that creates a more visually appealing and structurally sound deck surface.
Instead of having all the seams between boards lined up in a straight line, a staggered joint involves offsetting the seams so that they are not directly aligned. This creates a more natural and random appearance that resembles the look of a traditional wood deck.
Staggering the joints also helps to distribute the weight and stress on the deck more evenly, which can help to prevent warping and other forms of damage over time.
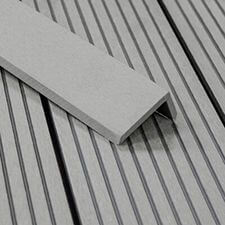
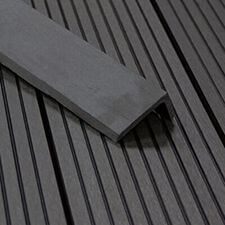
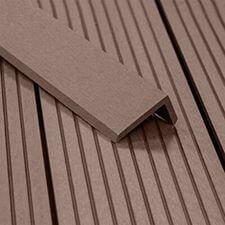
To fix Fascia Skirting or L Profile trim to your composite decking by Tough Decking, you can follow these steps.
- Start by cutting the fascia skirting or L profile trim to the correct length and width to fit around the perimeter of your deck.
- Use a chalk line or other straight edge to mark a line where the top of the fascia or trim will sit.
- Apply clear adhesive/sealant to the back of the fascia or trim, spreading it evenly over the surface.
- Align the fascia or trim with the chalk line and press it firmly into place against the edge of the decking.
- Use stainless steel screws to secure the fascia or trim to the decking. Make sure to pre-drill holes in the fascia or trim to prevent splitting, and use screws that are long enough to penetrate both the fascia and the underlying framing.
- Repeat the process for each section of fascia or trim until the entire perimeter of the deck is covered.
- Once all the fascia or trim is in place, use a saw or router to trim any excess material from the edges.